Hello Everyone! Today in this article we are going to discuss how to download and install Java JDK in your Operating System. This Java Development Kit (JDK) allows you to code and run your Java programs. So it's very essential to install JDK in your system. Now at this time, the latest version of java is 24, so we are going to download that. Now depending upon at what time you are downloading, it is always recommended that you should download and install the latest version.
Now Let's first check whether java has already been installed or not. So for that just simply type java -version in your Command Prompt.

So as you can see that java is not recognized as an internal or external command... which means java is not installed on your computer. So now you can proceed with installing java in your operating system.
So How to download and install Java for Windows?
Following are the steps for JDK 24 free download for 64 bit and installation.
Step 1) To download java, click here. Then simply click on JDK Download under Oracle JDK.
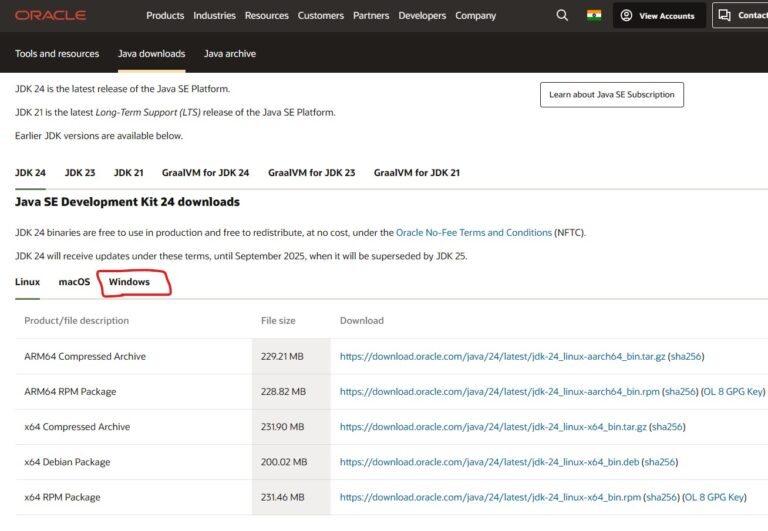
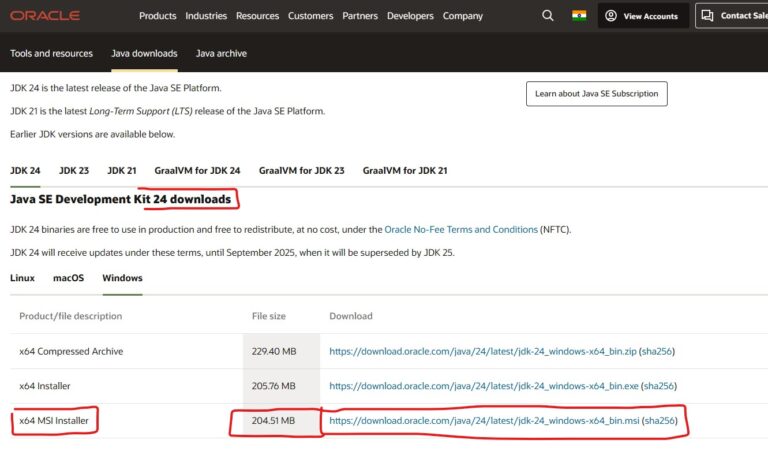
Step 2) Now you will be redirected to Java SE Development Kit 24 page. Here just simply scroll down and you will see Windows x64 Installer. In here you need to click on https://download.oracle.com/java/24/latest/jdk-24_windows-x64_bin.msijdk-11.0.10_windows-x64_bin.exe to download JDK.
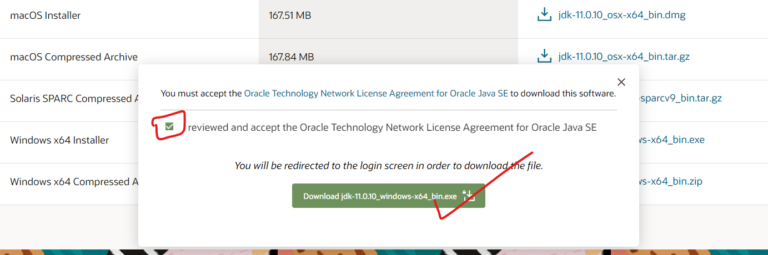
Step 3) Here first you need to accept the Oracle Technology Network License Agreement for Oracle Java SE. Then just simply click on Download JDK and it will start downloading your JDK.
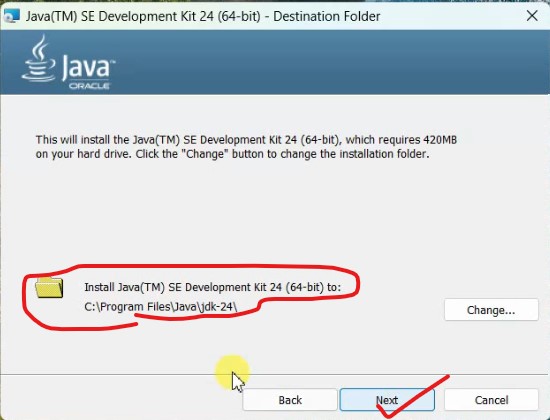
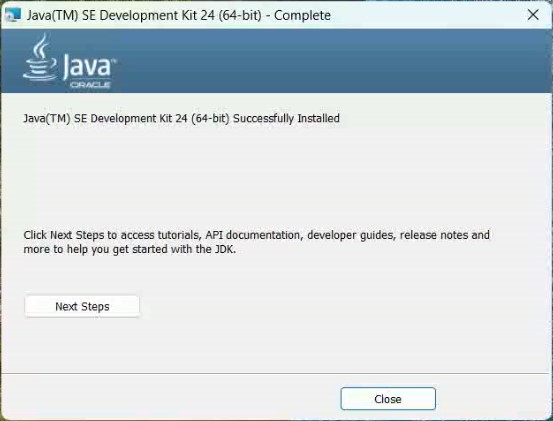
Step 4) Now just double click on the downloaded installation file. This will open up the Java Installation Setup wizard. Now just simply click on next.
Step 5) Now after installing java go to your c directory, then Program Files, then go to java directory, then go inside your bin directory. Now just simply copy the file path i.e "c:Program FilesJavajdk-24bin"

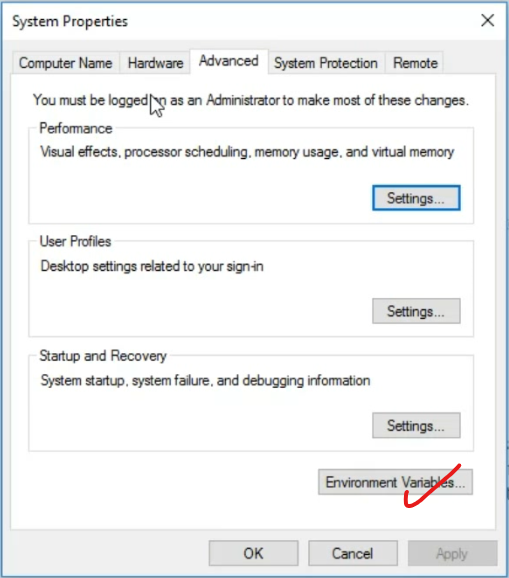
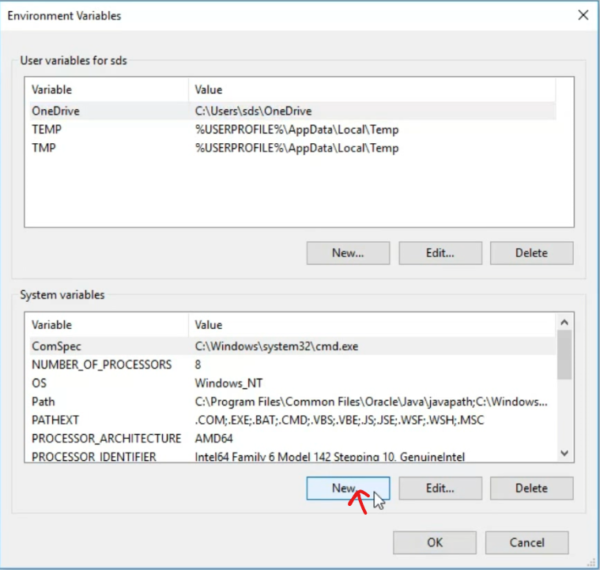
Step 6) Now search Environment Variables in your windows search and click on Edit System Environment Variables. Now this System Properties will pop up. Simply click on Environment Variables.
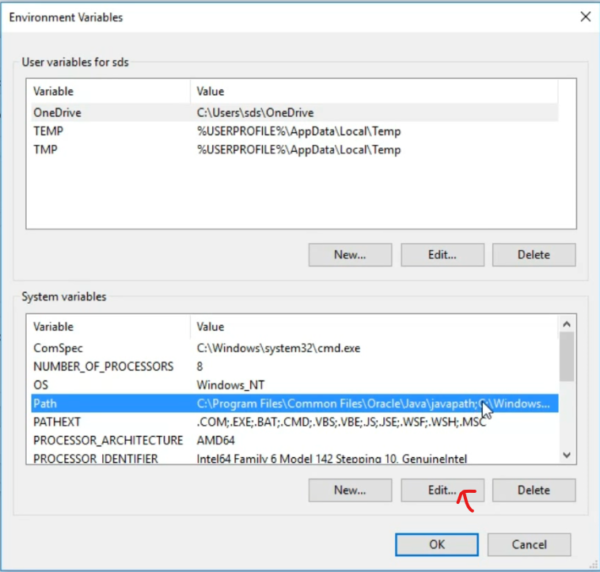
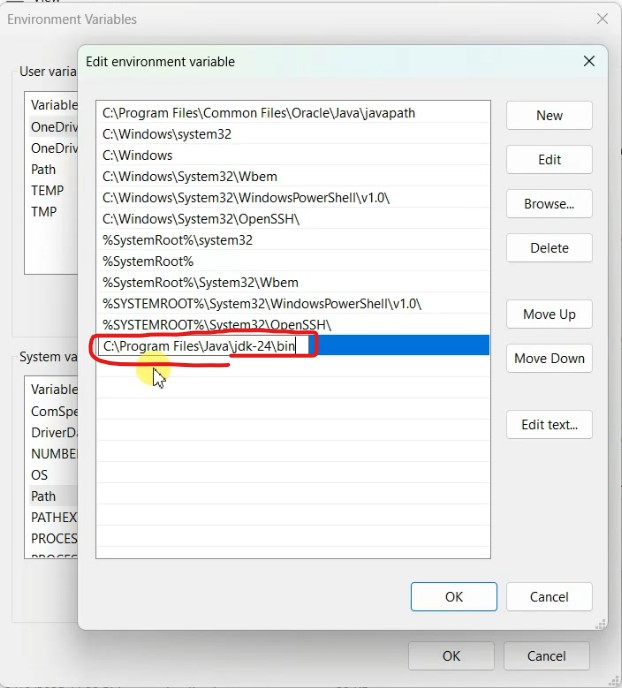
Step 7) Now click on Path under System variables and then click on Edit...
Step 8) Now click on New under Edit Environment Variable
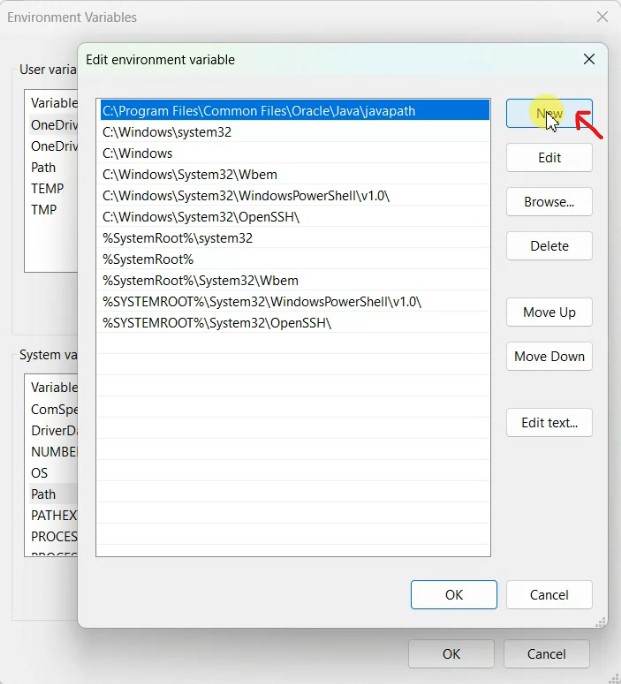
Step 9) You just paste the JDK installed complete path i.e "c:Program FilesJavajdk-24bin" the path on the new cell as shown below.
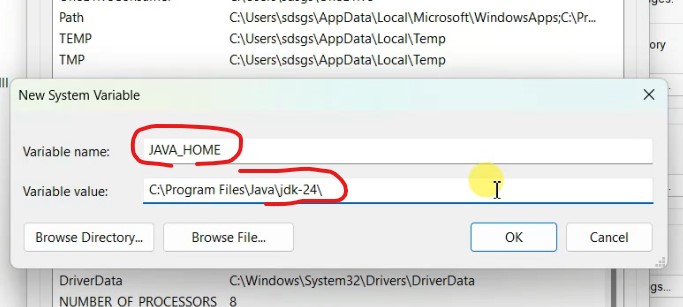
Step 10) Now after setting environment variable its time to set JAVA Home. So for that just click on New.
Step 11) Now type a Variable name as "JAVA_HOME_ENVIRONMENT" and then simply paste the JDK installed directory up to 24, and then OK and simply finish.
Step 12) After that you can confirm your java installation by simply typing java -version in your Command Prompt.
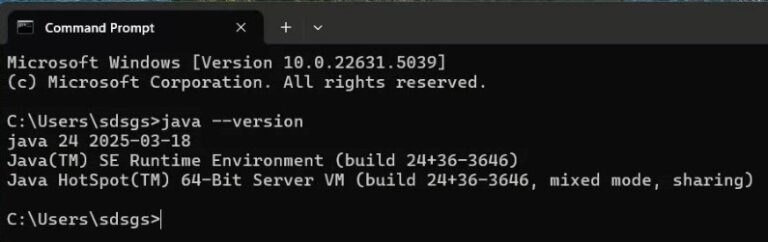
Now as you can see Java version 24 has rightly shown on Command Prompt showing java installation has been done successfully.
So congratulations!! :) You have successfully installed java in your OS.
If you face any difficulty, you can always comment and watch the following video.
👇👇👇
#### How to Install Java JDK 24 on Windows 10/11 [2025 Update] Step by Step JDK Installation Complete Guide
About the Author: gs_admin
A senior technical contributor specializing in architectural designs, software optimization, database structures, and developer education. Passionate about writing clean code and sharing engineering knowledge.